Industry

Zhejiang Balford Mechatronics Co., ltd focus on difficult stamping & deep drawing. Main product: motor housing and difficult custom deep drawn stampings.

  • Design principles and selection precautions of tensile parts

    By : Categories : Blog,Industry Comment: Comments Off on Design principles and selection precautions of tensile parts

    1. The design principles of the expander are as follows

    1. The designed telescopic parts should make the dimensional accuracy grade and surface roughness requirements as low as possible when ensuring normal use, which is conducive to the exchange of products, reduces waste, and ensures stable product quality.

    2. The designed telescopic parts should be beneficial to use the existing equipment, process equipment and process flow to deal with it as much as possible, and help to improve the service life of the die.

    3. The designed tensile parts must meet the product use and technical performance, and be easy to assemble and repair.

    Second, it is reasonable to determine that the punching direction should meet the following three requirements

    1. Make sure that the punch can enter the die.

    2. Make the area of ​​the punch contacting the blank large. The larger the contact surface, the smaller the angle between the contact surface and the horizontal plane, and the less likely the blank is to have local stress overload, which can lead to part fracture. The mold fit improves the tensile properties of the material, and it is easy to obtain a complete punch shape, which is beneficial to improve the deformation degree of the part.

    3. The resistance of each part of the pressing surface must be uniform and reliable. Uniform deep drawing is the main condition to ensure uniform and reliable feeding resistance of all parts of the material surface. In addition, the uniform feeding resistance of each part of the pressing surface is an important guarantee to ensure that the tensile part does not wrinkle or crack.

    3. When choosing tensile parts, the following points should be paid attention to

    1. For the production of tensile parts, try to choose a standard mold base, and the type and specification of the standard mold base determine the type and specification of the upper and lower mold bases. If you need to plan the die base by yourself, the diameter of the round die should be 30-70 mm larger than the diameter of the concave die, and the length of the rectangular die should be 40-70 mm longer than that of the concave die, and the width of the concave die can be slightly larger or equal. In order to meet the strength and stiffness, the thickness of the die base can be determined with reference to the standard die base, which is generally 1.0-1.5 times the thickness of the female die. For large non-standard mold bases, it is necessary to formulate a casting layout plan according to the actual needs, according to the technical requirements of casting and casting process requirements.

    2. The selected or planned formwork must be suitable for the working platform of the selected press and the relevant dimensions of the relevant sliders, and the necessary inspections shall be carried out. If it is said that the overall size of the miniaturization of the lower die base should be at least 40-50mm larger than the size of the leakage hole of the press table.

    3. The mold base material generally uses HT200.HT250 or Q235 steel, and the large precision mold mold base uses ZG35.ZG45.

    4. The parallelism of the upper and lower surfaces of the die base should meet the requirements, and the parallelism is generally grade 4.

    5. The middle distance of the guide sleeve and guide post device holes of the upper and lower die bases must be universal, and the accuracy is generally required to be less than ±0.02mm; the axes of the guide posts and guide sleeve device holes of the die base should be in line with the The upper and lower planes are straight, and when the sliding guide post and guide sleeve are installed, the straightness is usually grade 4.

    6. The upper and lower surface roughness of the mold base is Ra1.6-0.8μm, if the parallelism can be guaranteed, it can be reduced to Ra3.2-1.6μm. Gasket: The function of the gasket is to directly accept and disperse the pressure transmitted by the bump, so as to reduce the pressure transmitted by the punch and avoid the part of the die seat from being pressed in. The outer dimensions of the pad are the same as the die, and the fixing method is selected by screws. and pinned.

    During the stretching process, due to the different magnitude of the force, the thickness of the stretched part is also different. In general, the bottom center maintains the original thickness, the material at the bottom rounded corners becomes thinner, the material at the top near the upper convex edge becomes thicker, and the material at the rounded corners around the rectangular piece becomes thicker. Standard method for the size of tensile products: When designing a drawing product, the size on the product drawing should be clearly stated, and the outer diameter or inner diameter should be guaranteed, and the inner and outer dimensions should not be marked at the same time. The inner diameter calibration method of the arc of the tensile part: the inner diameter of the concave and convex arc of the tensile part and the height dimensional tolerance of the cylindrical part formed at one time are half of the standard 16-level precision tolerance (GB) and the standard 16-level precision tolerance. in plus or minus signs.

    Regarding the design of the above-mentioned tensile parts, in general, there are a series of advantages such as high tensile productivity, low processing cost, high material utilization rate, simple operation, and easy realization of mechanization and automation. Therefore, the market prospect is objective, and only on the premise of ensuring the quality of the drawing parts processing enterprises can they make steady progress. I hope the above can be helpful to readers.

    Read More →
  • Know some types of temperature sensors

    By : Categories : Blog,Industry Comment: Comments Off on Know some types of temperature sensors

    If the voltage difference is amplified, the device produces an analog signal that is proportional to the temperature.

    Temperature sensor type:

    Thermocouple Sensor

    Thermistor Sensor

    Resistance temperature detector

    thermometer

    Infrared temperature sensor

    Semiconductor-Based Sensors

    Thermocouple Sensors –

    A thermocouple sensor is a temperature measurement tool located on two different conductors that touch each other at one or more points. It produces a voltage when the temperature of one of the points is different from the reference temperature of one of the points and the reference temperature of the rest of the circuit.

    Thermistor Sensor –

    This type of sensor is widely used in body thermometers. If the temperature changes, so does the current or resistance.

    Thermistors are instruments made of semiconductor materials whose resistivity is particularly sensitive to temperature.

    The resistance of the thermistor decreases as the temperature increases, so when the temperature changes, the change in resistance can be monitored.

    Resistance temperature detectors –

    They are temperature sensors. Temperature sensors with resistors accumulate temperature changes that change the resistance value.

    Resistance temperature detectors are used in the temperature range of -500c to 5000c for thin films and +2000c to 8500c for wirewound varieties. Thin-film (resistance temperature detector) elements have a thin layer of platinum on the underlying material. A new type of model was created, providing the circuit, and providing the specific resistance.

    thermometer –

    It is a device for measuring the temperature of any kind of solid or liquid, this alcohol is used in tubes that change volume by changing the temperature.

    Its volume is proportional to temperature.

    Infrared temperature sensor –

    This is an electronic non-contact sensor that can be used to emit infrared radiation. IR temperature sensors on the market are I through the surface temperature that emits radiation. Its cost depends on its operation. Its accuracy level depends on its cost. In other words, low cost – low accuracy level and high cost – high accuracy level.

    Semiconductor based sensors –

    It operates under reverse bias with small capacitance and low leakage current. They are formed on thin silicon wafers. They are compact and produce linear output with a small temperature range. They also feature low cost and accurate tracking calibration.

              Semiconductor-based sensor types –

    Voltage output

    Current output

    digital output

    Resistive output

    simple diode

    Application of temperature sensor:

    These are used in electric motors to measure motor winding temperature, bearing temperature, brush temperature.

    These are cables used to measure the temperature inside the bench.

    Used in mechanical engines to measure engine oil temperature and engine bearing temperature.

    In the rubber, plastic, biomedical industries.

    Read More →
  • How does the exhaust gas temperature sensor work?

    By : Categories : Blog,Industry Comment: Comments Off on How does the exhaust gas temperature sensor work?

    Features and Benefits

    The single-tube sensing component structure can reduce the volume.

    The sensing part and the special-shaped thermistor bring high responsiveness.

    Withstand engine vibration.

    Detects temperatures from -40 to 1000 degrees Celsius.

    Exhaust gas temperature sensor 2200 148

    innovative design

    The sensing element and sensing section of the EGTS are specifically designed to achieve high performance in a 90% smaller design.

    reliable performance

    In addition to being more compact, DENSO EGTS is also heat and vibration resistant, which means no sensor damage in the exhaust system.

    high accuracy

    The sensing section and the molded thermistor enable high responsiveness – the ability to respond to a sudden rise from room temperature to 1000 degrees Celsius in less than 7 seconds.

    Types and Features

    DENSO’s unique EGTS design and wide range of products provide the right sensor type to suit rapidly growing applications and vehicle models.

    Exhaust gas temperature sensor type

    response type

    All DENSO sensors are highly responsive and accurate. To ensure you get the level of performance you need, we offer standard and highly responsive versions of the EGTS.

    Read More →
  • Reasons and treatment methods for wrinkling of tensile parts

    By : Categories : Blog,Industry Comment: Comments Off on Reasons and treatment methods for wrinkling of tensile parts

    There are many reasons for the wrinkling of the pulling piece, mainly in the following aspects: the stretched blank is not thick enough, the pressure it can bear is naturally small, and it is easy to wrinkle during the stretching process; each blank is not pressed Select the corresponding elongation coefficient for the texture of the material, and the degree of deformation is difficult to control. If the control is not good, deformation will occur; the blank holder is seriously damaged, and the same pressure cannot be applied to the blank, resulting in uneven pressure capacity and wrinkling. .

    The thickness of the drawn blank should be relatively thick, so that it can withstand relative pressure during stretching, and it is not easy to deform and wrinkle; choose an appropriate stretching coefficient corresponding to the texture of the blank, and the degree of deformation is easy to control; The rings need to be replaced or repaired frequently, so that the blanks are under equal pressure and are not prone to wrinkling.

    1. How to remove wrinkles when stretched parts appear?

    1. It has been proved by a large amount of practical experience in production that the main reason for the wrinkling of the stretched parts is the accumulation of materials during the stretching process and the excessive speed of local material movement. When designing the actual solution, the corresponding mechanism of the mold should be adjusted from the above aspects, and good results can be obtained.

    2. The way to prevent wrinkling is to determine whether the die head can press the material during stretching, so as to determine the correct flow rate of the sheet. During the drawing process, the flow rate of the sheet material is too fast during the stamping process, which will cause wrinkles; on the other hand, the flow rate of the sheet material is too slow, which may cause the stamping part to crack.

    3. When the wrinkles appear evenly around the stretched piece, it should be judged that the pressing force is not enough.

    4. When extruding conical and hemispherical parts, most of the material is suspended when the extrusion begins. Since it is easy to cause wrinkling of the side walls, in addition to increasing the blank holder force, the shrinkage ribs should be enlarged to increase the tensile stress in the plate.

    5. If the fillet radius of the die is too large, the bending resistance of the blank will be smaller after the blank flows into the die through the fillet of the die. The better the bending resistance, the easier it is to wrinkle. The smaller the diameter of the die, the greater the bending resistance caused by the bending deformation, and the less likely it is to wrinkle, but it is easy to cause cracking and hair pulling of the workpiece.

    2. Precautions for the use, maintenance and repair of tensile parts

    1. Before using the stretched parts, a strict inspection should be carried out, and the dirt should be cleaned up, and the guide sleeve and the mold of the stretched parts should be carefully checked whether the lubrication is good.

    2. According to the installation procedure of the die, install the convex and concave die on the turntable to ensure that the direction of the convex and concave drawing stamping parts is consistent, especially the drawing and pressing parts with direction requirements (non-circular and square) should be careful to prevent wrong installation. opposite.

    3. Regularly check the turntable of the bed and the mold mounting seat to ensure the coaxial accuracy of the upper and lower turntables.

    4. When installing the mold, the puncher should use softer metal (such as copper, aluminum, etc.) to make the operating tool to prevent the drawing punch from being broken during the installation process.

    5. After the cutting edge of the punch and the concave die of the drawn part is worn, stop using it immediately and sharpen it in time, otherwise it will rapidly expand the wear of the cutting edge of the die, accelerate the wear of the die, and reduce the quality of the punching part and the life of the die.

    6. In order to ensure the service life of the stretched parts, the die spring should be replaced regularly to prevent the spring fatigue damage and affect the service life of the stretched parts.

    The above are the reasons and treatment methods for the wrinkling of the stretched parts. Attention should be paid to the processing and production of the stretched parts. When using mold equipment such as a press or a die, care should be taken to ensure that the strips are carried out under normal working conditions to prevent transportation. The material is fed along the correct position or not according to the corresponding gap. I hope the above can be helpful to readers.

    Read More →
  • What are the factors that affect the processing quality of drawing parts?

    By : Categories : Blog,Industry Comment: Comments Off on What are the factors that affect the processing quality of drawing parts?

    Materials with good tensile properties can be reused if multiple die tests fail to meet the requirements. Where there is quality, there will be success. Usually 08 steel is produced, which is divided into boiling steel and killed steel. Its cost is relatively low, the surface quality is relatively good, but the segregation is serious, and there is a tendency to “strain aging”. It is not suitable for parts with high stamping performance and strict appearance requirements. Consistent performance, but more expensive.

    In the process of deep drawing, the grinding of the drawing die and both sides of the blank holder is not enough, especially the deep drawing of stainless steel plate and aluminum plate, it is more likely to appear drawing marks, and sometimes serious tensile cracks will occur. No wrinkles, no scars. According to the principle that the area of ​​the blank is equal to the area of ​​the stretched part (plus trimming allowance), the correct positioning design of the blank should be carried out. However, the shape and process of drawing parts are often more complex, sometimes thinning and stretching. Although many 3D softwares are available for the calculation of spreading materials, their accuracy cannot meet the requirements.

    We know that there is a hole in the middle of all the dies of the drawing die, such as circle, square, octagon, etc. Next, let’s take a look at the processing characteristics of the drawing die;

    1. The gap between punch and die should be uniform. For drawing dies without guide equipment, a piece should be placed to adjust the correct installation direction of the punch and die. For the guide die, the gap between the punch and the die should be uniform during assembly.

    2. The material has good sealing and elastic deformation during tensile deformation, so the punch and die need to be tested before hardening, which is easy to process and has good wear resistance. After the tensile test mold is qualified, the blanking mold is made according to the test modulus.

    3. For the drawing die without guide equipment, it is necessary to place a piece to adjust the correct installation position of the punch and the die; when assembling the guide drawing die, it is necessary to ensure that the gap between the punch and the die is uniform.

    4. Generally, when processing the drawing die, first make the drawing die, and then make the blanking die according to the condition of the test die, the processability of the parts and the convenience of the maintenance of the die, and the design should be considered carefully.

    5. The processing quality of deep drawing dies has been paid more and more attention by people, and improving the quality of drawing dies is an important factor.

    Tensile die process arrangement

    1. Parts where the material is thinner and the drawing depth is greater than the diameter: the height can be increased by reducing the diameter of the cylinder, so that the fillet radius can be gradually reduced.

    2. Parts with thicker material and closer drawing depth and diameter: If the height remains the same, the fillet radius can be reduced, and the cylinder diameter can be reduced at the same time.

    3. When the drawing die is large and the radius of the circle is small, it can be achieved by multiple forming.

    4. When the drawing die is too large, it can be formed by bulging as required.

    When designing a drawing die, it is necessary to consider the relevant contents of the above-mentioned drawing part die design, such as tensile coefficient, material limit, determination of elasticity, drawing direction, pull-up or pull-down. , sometimes the mold is scrapped. Therefore, the production experience of the drawing die is also very important. I hope the above will be helpful to readers.

    Read More →
  • Common Defects and Preventive Measures of Stainless Steel Drawing Die

    By : Categories : Blog,Industry Comment: Comments Off on Common Defects and Preventive Measures of Stainless Steel Drawing Die

    The selection of suitable convex and concave die fillets for stainless steel wire drawing is closely related to the size and distribution of stress. If the radius of the fillet is large, the pressing area of ​​the blank holder is insufficient, which will easily cause instability and wrinkling; if the fillet is too small, it increases the resistance of the material entering the die during deformation, making it difficult for the material to flow and transfer inward, thereby increasing the force transmission. area, which may cause cracking. Therefore, it is very important to choose a reasonable punch and concave die fillet radius. Under the effect of preventing cracks, the punch relative to the fillet radius rp/ is about 4. The degree of polar deformation of the die and punch will increase, and the relative fillet radius of the die will increase by 5mm~8mm, which helps prevent cracking.

    4. Thin strip stretching is used for stainless steel stretching: previous testers have also confirmed that the thin strip stretching method can significantly reduce the maximum tangential residual stress of the stretched parts and effectively prevent longitudinal cracking. According to the degree of deformation and the thickness of the original plate, an appropriate thinning coefficient (usually 0.9t~0.95t) is selected. If the value is too small, the deformation stress of the deep-drawing part will increase sharply, resulting in the bottom cracking.

    5. An intermediate annealing process is added to the deep drawing method for stainless steel drawing: after multiple deep drawing, an intermediate annealing process should be carried out, which can completely eliminate residual stress and restore the austenitic stainless steel structure. For high-strength steels, it is generally necessary to go through 1 to 2 stretching processes before moderate annealing. For example, 1Crl8Ni9Ti is usually heated at 1150~1170℃, heated for 30min, and then cooled in airflow or water. Moreover, whether it is the heat treatment between processes or the final heat treatment of the finished product, it should be carried out as soon as possible after stretching to avoid deformation or cracking of the workpiece due to internal stress due to long-term storage. However, both annealing and post-cleaning annealing increase product cycle time, which affects surface quality.

    6. Use suitable lubricants for stainless steel drawing: using suitable lubricants has a significant effect on stainless steel deep drawing. The lubricant can form a film with certain toughness and ductility between the convex and concave dies, which is beneficial to the stretch forming of stainless steel. Due to the large deformation of stainless steel deep-drawing parts and the difficulty of forming, polyvinyl fluoride film can be used as a lubricant in actual production. PTFE membrane has good tear resistance, certain toughness and ductility, and is easy to clean. After coating the dry film, in the stretching process, the dry film can be deformed together with the blank, and can always separate the blank from the mold, and the film itself has a certain porosity and a large number of fiber cracks, so it can be stored in a certain amount. of lubricating oil.

    The above-mentioned common defects and preventive measures of stainless steel drawing die, in the actual production process, the drawing die is prone to strain, and to solve this problem, the adhesive wear should be reduced by changing the characteristics of the contact pair. I hope the above can be helpful to readers.

    Read More →

  • What are the main applications of stamping processing?

    By : Categories : Blog,Industry Comment: Comments Off on What are the main applications of stamping processing?

    The molds used in stamping processing are generally specialized. Sometimes a complex part needs several sets of molds to be processed and formed, and the mold manufacturing has high precision and high technical requirements, which is a technology-intensive product. Therefore, only in the case of large production batches of stamping parts, the advantages of stamping processing can be fully reflected, so as to obtain better economic benefits.

    Of course, stamping also has some problems and disadvantages. It is mainly manifested in the noise and vibration generated during the stamping process, and the operator’s safety accident occurs from time to time. However, these problems are not entirely caused by the stamping process and the mold itself, but are mainly caused by traditional stamping equipment and backward manual operations. With the advancement of science and technology, especially the development of computer technology, and the advancement of mechatronics technology, these problems will definitely be solved as soon as possible.

    First, the characteristics of mechanical processing

    Compared with other methods of machining and plastic working, stamping has many unique advantages, both technically and economically. The main performance is as follows.

    (1) The production efficiency of stamping processing is high, and the operation is relatively convenient, and it is easy to realize mechanization and automation. This is because stamping relies on punching dies and stamping equipment to complete the processing. The number of strokes of ordinary presses can reach dozens of times per minute, and the high-speed pressure can reach hundreds or even thousands of times per minute. May get a punch.  

    (2) During stamping, since the die ensures the size and shape accuracy of the stamping parts, and generally does not damage the surface quality of the stamping parts, and the life of the die is generally long, the quality of the stamping is stable, the interchangeability is good, and it has “exactly the same”. “Characteristics.  

    (3) Stamping can process parts with a wide range of sizes and complex shapes, such as stopwatches as small as clocks, as large as automobile longitudinal beams, covering parts, etc., plus the cold deformation hardening effect of the material during stamping, the strength of stamping and stiffness are high.  

    (4) Stamping generally does not generate chips and scraps, consumes less material, and does not require other heating equipment, so it is a material-saving and energy-saving processing method, and the cost of stamping parts is low.  

    2. Materials

    1. Ordinary cold-rolled sheet spcc spcc refers to the continuous rolling of steel ingots into steel coils or sheets of required thickness through a cold rolling mill. There is no protection on the surface of spcc, and it is easily oxidized when exposed to the air, especially in a humid environment, the oxidation speed is accelerated, and dark red rust appears.

    ⒉. The base material of galvanized steel sheet secc secc is a general cold-rolled steel coil, which becomes an electro-galvanized product after degreasing, pickling, electroplating and various post-treatment processes in a continuous electro-galvanizing production line. secc not only has the mechanical properties and approximate processability of ordinary cold-rolled steel sheets, but also has superior corrosion resistance and decorative appearance. It has great competition and substitution in the market of electronic products, home appliances and furniture. For example, the commonly used computer case is SECC.

    3. Hot-dip galvanized steel sheet sgcc Hot-dip galvanized steel coil refers to the semi-finished product after hot-rolling pickling or cold-rolling, after cleaning, annealing, and immersing it in a molten zinc bath with a temperature of about 460 ° C, and making the steel sheet plated. The upper zinc layer is then tempered, leveled and chemically treated. The sgcc material is harder than the scc material, has poor ductility (avoid deep drawing design), thicker zinc layer, and poor weldability.

    4. The content of stainless steel sus301  cr (chromium) is lower than that of sus304, and the corrosion resistance is poor, but after cold working, it can obtain good tensile force and hardness, and has good elasticity. It is mostly used for shrapnel springs and anti-EMI.

    5. Stainless steel sus304  One of the most widely used stainless steels, because it contains ni (nickel), it is richer in corrosion resistance and heat resistance than steel containing cr (chromium), has very good mechanical properties, and has no heat treatment hardening phenomenon. There is no elasticity.

    Read More →
  • Methods to solve the uneven appearance and side scratches of stamping and drawing parts

    By : Categories : Blog,Industry Comment: Comments Off on Methods to solve the uneven appearance and side scratches of stamping and drawing parts

    There are many reasons for the uneven shape of punching and drawing parts. The main reasons and solutions are as follows:

    1. There is no air hole on the punch.

    When punching, the air in the workpiece is pressed out by the punch and cannot be discharged, which makes the shape of the drawn part uneven, which is also the reason why many people tend to ignore it. The solution is to add air vents on the punch.

    2. The blank is uneven.

    The surface of the blank is uneven, causing the surface of the deep drawing workpiece to be uneven. The treatment method is to replace the material with good surface quality.

    3. Strong rebound of material.

    The material rebounds greatly, resulting in the formation of deep-drawn parts. The solution is to increase the annealing or forming process.

    4. Protruding, the mold gap is too large.

    If the gap is too large, the working surface of the mold loses the straightening effect on the workpiece wall, resulting in uneven shape of the workpiece. Therefore, the mold gap must be trimmed or replaced.

    5. The negative deviation of the thickness of the material is too large.

    If the material is too thin, the mold gap will be relatively large, resulting in uneven shape. The material needs to be replaced with an appropriate thickness.

    In the process of stamping and drawing parts, if the phenomenon of uneven shape occurs, you may first find out the reasons from five aspects.

    For the side-scribing problem of drawing parts, factors such as product size, material, thickness, drawing height, etc. must be considered when designing the stamping and drawing die gap. Unreasonable die gap design will also cause scratches. For high-level or small-diameter products, multiple deep drawing operations must first be calculated when designing the die. If the process design is too small, it will also cause scratches.

    As far as stainless steel products are concerned, the roughness of the punching and wire drawing of the mold also has a great influence on the surface quality of the product, and the surface of the mold should be polished as much as possible. In view of the severe deformation of stamping and drawing parts, try to choose a hydraulic press for processing. If the mechanical stamping process is too fast, it is easy to cause the surface quality of the product to not meet the requirements.

    For punching and drawing parts, when selecting raw materials, materials that are easy to stretch in a soft state must be selected. For some special products, annealing while stretching can also be considered. In actual production and processing, we must pay more attention and more analysis, so that we can better solve problems when encountering problems. In fact, the processing process of stamping and drawing parts is not so complicated. For stamping parts that customers are satisfied with, we need to see more and see more. Analytics for faster resolution when problems are encountered.

    The above is about the uneven appearance and side scratches of stamping parts. Various problems will occur in the process of stamping parts, but the solutions to the problems can be found in time to ensure the processing of stamping parts. Quality is the foundation of the long-term development of an enterprise. I hope the above can be helpful to readers.

    Read More →
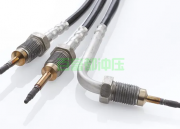
  • The role of nitrogen and oxygen sensor in exhaust gas monitoring

    By : Categories : Blog,Industry Comment: Comments Off on The role of nitrogen and oxygen sensor in exhaust gas monitoring

    Direct-injection gasoline engines, motorsport applications, and even motorcycles place very specific demands on the technology used for exhaust gas measurement and its aftertreatment, but as you will learn, the engine brings engineers what it takes to “keep it clean” major challenge. Environmental protection In the popularization of automobiles, nitrogen and oxygen sensor technology is particularly important.

    Nitric oxide and nitrogen dioxide

    To make gasoline engines more economical and environmentally friendly, automakers are increasingly relying on direct gasoline injection engines, which under certain conditions, mainly part load (cruising) conditions, can operate on fairly lean air/fuel mixtures run. The result of this could be a 12-20% reduction in fuel consumption, but as with most things in life, there is a price to pay for this gain.

    One of the gaseous compounds produced as a result of the combustion process within an engine during spark ignition is a compound collectively referred to as NOx. For the automotive industry, the term is used to describe nitric oxide and nitrogen dioxide contained in exhaust gas. NOx compounds are environmentally harmful by-products of the combustion process, which are effectively addressed in most vehicles through the function of the three-way catalytic converter.

    Spark ignition engines tend to produce more of these compounds when operating on very lean fuel conditions, while direct injection engines operate in this region in stratified mode. Three-way catalysts cannot cope with this problem due to the excess oxygen in the exhaust gas, which reforms NOx and requires additional treatment of the exhaust gas.

    Read More →
  • What factors will affect the tensile coefficient in the design of the drawing part processing mold

    By : Categories : Blog,Industry Comment: Comments Off on What factors will affect the tensile coefficient in the design of the drawing part processing mold

    1. Processing characteristics of wire drawing dies

    1. Protruding, the gap between the concave molds should be uniformly produced. For a drawing die without a guide device, the same piece should be placed so that the punch can be adjusted and the position of the die is correct; for a guided drawing die, it is also necessary to ensure that the gap between the punches is uniform.

    2. The material has good compactness and elastic deformation when stretched and deformed. Before the convex and concave dies are hardened, test punching and trimming should be carried out. It is easy to process and has good wear resistance. After the deep drawing test die is qualified, press The blanking die is manufactured in the state of the die trial.

    3. For the drawing die without guiding equipment, it is required to place the same piece, adjust the punch, and the position of the die is correct; for the drawing die with guidance, it is necessary to ensure that the gap between the punches is uniform when assembling.

    4. The processing of drawing dies is generally to make drawing dies first, and after passing the deep drawing test, make blanking dies according to the test conditions, the processability of die parts and the convenience of die maintenance, all of which should be considered in design. .

    5. The processing quality of deep drawing dies has been paid more and more attention, so processing the drawing dies into parts is also an important factor to improve the quality of the dies.

    2. Tensile mold characteristics

    1. The concept of stretching.

    (1) Stretching: Press the sheet into a hollow piece (almost no change).

    (2) Stretching process: The material is transferred to the side wall of the cylinder (box) through a plane (flange), so that the overall dimensions of the plane will change significantly.

    (3) Tensile coefficient: the ratio of the tensile diameter to the diameter of the blank (the degree of deformation from the blank to the workpiece).

    2. Main influencing factors of tensile coefficient:

    (1) Mechanical properties of the material (reduced strength – elastic deformation; tensile strength – plastic deformation; elongation coefficient; section shrinkage).

    (2), relative material thickness.

    (3), the number of stretches.

    (4), stretching method.

    (5), convex and concave die fillet radius.

    (6) The drawing surface is clean, lubricated, clearance, etc.

    (7), expansion rate.

    3. Layout of stretching process

    1. Parts whose drawing depth is less than the diameter: the height of the cylinder can be increased by reducing the diameter of the cylinder, so that the angular radius can be gradually reduced.

    2. Material parts with equal thickness and diameter: The height can be kept constant to reduce the radius of the fillet, if it is to gradually reduce the diameter of the small cylinder.

    3. The flange is large and the circle radius is extremely small: it should be obtained by multiple forming.

    4. The flange is too large: if necessary, use the expansion molding method.

    In order to reflect the principle of “unchanged convex edge”, the flange formed by one stretch does not participate in all subsequent stretching deformation, while the wide flange stretching reduces the material that first enters the die (that is, the material that forms the wall and the bottom). ) 3~10% more than the final stretched material.

    Note: The number of upper bounds for multiple times is taken from the lower bounds of multiple times within the zone. The excess material will be returned to the flange in the subsequent multiple drawing steps, which will thicken the flange without pulling and can be repaired by reshaping. Therefore, each stretch height should be strictly controlled when stretching.

    The above introduces the relevant content in the design of the drawing part processing mold. During the drawing process, there is friction between the material and the die, so there should be a special drawing lubricant. High friction will not only increase the tensile coefficient, but also increase the pulling force, which is detrimental to the scratches on the mold and workpiece surface. I hope the above will be helpful to readers.

    Read More →
  • What is the role of resilience in the processing and forming of metal drawing parts?

    By : Categories : Blog,Industry Comment: Comments Off on What is the role of resilience in the processing and forming of metal drawing parts?

    Electromagnetic forming of metal, metal drawing parts is a forming process. Forming can not only expand the forming range of aluminum alloys, but also improve the formability of aluminum alloys. The specific method of forming aluminum alloy covers using composite stamping is to fit electromagnetic coils into the sharp corners and difficult-to-form contours of aluminum alloy covers. It is formed by electromagnetic method, and then a pair of molds are formed on a press, and then deformed with electromagnetic coils.

    The results show that this composite forming method can obtain aluminum alloy coverings that are difficult to obtain by a single stamping method. The present invention can also be used for the connection of metal drawing parts formed products in the punching machine and the composite molding of various products. This method can be used to stamp and form many difficult-to-form materials, such as magnesium alloys, titanium alloys, etc. Since punching requires the punching machine to stop during the descending process to ensure the heating time of the material, the CNC crankshaft servo motor punching machine, punching can also be realized in the punching die, and the composite processing including tapping, riveting and other processes effectively expands the punching The range of processing has laid a solid foundation for the popularization and application of magnesium alloys in the plastic processing industry.

    1. The rebound effect of the hardware puller during the forming process

    1. Thickness of stamping material: The thickness of the plate has an important influence on the bending performance during the forming process. The larger the plate thickness, the smaller the springback phenomenon, the reason is that with the increase of plate thickness, the more plastically deformed material, the greater the elastic recovery deformation, and the smaller the springback. Due to the continuous improvement of the strength of the thick plate material, the problem of the dimensional accuracy of the parts is becoming more and more prominent. The mold design and post-process debugging need to have a certain understanding of the nature and size of the springback, so as to take corresponding countermeasures and remedial measures.

    2. Die drawbeads: Die drawbeads are widely used in today’s technology. Correctly setting the stretch position can change the flow direction of the material and distribute resistance on the press surface. Therefore, to improve the formability of the material, set tensile ribs on the parts that are easy to rebound, so that the more fully formed the parts, the more uniform the stress distribution, and the smaller the rebound.

    3. Mechanical properties of stamping materials: There are metal stamping parts of different strengths on automobiles. From ordinary steel plates to steel plates, the yield strength of different plates is different. The higher the yield strength of the board, the easier it is to bounce back. This is the DP series of dual-phase high-strength steels.

    4. Stripping edge blanking pressure: stripper blank blanking forming is an important technological measure. By continuously optimizing the blank holder force, the flow direction of the material can be adjusted and the stress distribution of the material can be improved. Increasing the blank holder can make the part stretch more fully, especially if the side wall and the R angle of the part are sufficiently formed, the internal stress difference will be reduced, and the springback will be reduced.

    5. Shape and complexity of stamping parts: parts of different shapes are very different. Parts with complex shapes are generally formed at one time to prevent springback due to improper molding. In addition, some special-shaped parts are easier to spring back, such as U-shaped parts, when analyzing the forming, the springback compensation problem should be considered.

    The above is the relevant content of hardware drawing parts processing. The production and processing products of high-quality stretched parts should be made of high-quality metal or non-metallic plates; secondly, the surface of the material will not be damaged during the stamping process; in addition, the production and processing products of stretched parts have good dimensional accuracy. Only the above three points can be said to be the production and processing products of high-quality stretched parts. I hope the above will be useful to readers.

    Read More →
  • How to identify the quality of high-quality stretched parts?

    By : Categories : Blog,Industry Comment: Comments Off on How to identify the quality of high-quality stretched parts?

    1. Avoid washing: For paper air, do not use any oily cleaning; for fur parts, it is not suitable to use oily cleaning.

    2. Avoid oil: The engine is filtered with dry paper. If it is stained with oil, it is easy to suck the high-concentration mixture into the cylinder, resulting in insufficient air volume, increased fuel, and reduced engine power; if the V-belt is stained with oil, it will accelerate its corrosion and aging. ; Brake shoes, dry clutch friction pads, and brake belts are stained with oil, which will threaten driving

    3. Heat avoidance: The temperature of the engine is too high, and it is easy to overheat and melt and cause the cylinder. The coils of electrical equipment such as appliances are overheated and are easily scrapped.

    4. Pressure avoidance: If the tire casing is stored in a pile pressure state for a long time, it will be deformed due to extrusion if it is not turned over in time; the air filter cannot be filtered if the paper filter element of the fuel filter is squeezed; the rubber oil seal, Triangular tape, tubing, etc. can not be squeezed.

    5. Antifouling property: If the components of fuel filter, air filter, hydraulic oil filter and various filters are too dirty, the filtering effect will be poor. Sink radiator. The air-cooled cylinder block, cylinder head heat sink, cooler and other components are too dirty, which will lead to poor heat dissipation and high temperature.

    6. Anti-reverse property: The engine cylinder head gasket cannot be installed reversely, otherwise it will cause premature ablation damage to the cylinder head gasket; the engine fan blades must not be installed reversely; the installed tires and herringbone pattern tires should be installed on the ground. Make the chevrons point to the back.

    7. Avoid repetition: some parts should be used at one time. Individual drivers or maintenance personnel use them repeatedly to save or not understand the taboos, which may easily cause accidents.

    8. Avoid near fire: If rubber products such as tires, triangular tapes, cylinder liner water blocking rings, and rubber oil seals are close to the fire source, they are easy to deteriorate or damage, and on the other hand, they may cause fire.

    9. Avoidance: The engine valve locks should be installed in pairs. If they are missing or missing, the valve will be out of control and the piston and other components will be damaged; engine connecting rod bolts, flywheel bolts, cotter pins on bolts, locking screws or spring washers Wait.

    Hidden dangers when using hardware stretching parts:

    1. Minimize the fillet radius of the die.

    2. Increase the amount of stretch by stretching multiple times, leaving as many flanges as possible.

    3. Avoid using the wrong method when designing the stretching process.

    4. The blank holder of the stretched parts should be ground frequently to increase the blank holder force and prevent wrinkling. The use of copper alloy sheets such as brass, which is always placed during severe forming, is also prone to longitudinal cracks.

    The above is the relevant content, thickness, shape and size of metal drawing parts processing and drawing parts materials. In the stamping process and mold design, special attention should be paid to the calculation of the blank size of the drawing parts, although the length of the drawing parts is not large. , but the depth dimension is relatively large. Hopefully the above will be helpful to readers.

    Read More →
  • What is the function of multiple stretching in the processing of automobile drawing parts?

    By : Categories : Blog,Industry Comment: Comments Off on What is the function of multiple stretching in the processing of automobile drawing parts?

    1. The key to determining the technical performance of automotive tensile parts

    1. Punching direction to determine the punching direction of the part is to determine the stretching process, the first problem encountered. It not only determines whether a satisfactory stretch can be drawn, but also affects the number of process compensation parts and the shape of the binder surface. The correct judgment of the stamping direction should meet the following three requirements.

    (1) Make sure that the punch can enter the die. The shape of the lower right corner of the die protrudes outward, and the convex point exceeds the size of the die, so that the punch cannot enter the die, and the stretching direction cannot be stretched. Therefore, it is necessary to change the drawing direction in order to enter the die.

    (2) Make the contact area between the punch and the blank large. The larger the contact surface, the smaller the angle of the contact surface to the horizontal. The blank is less prone to some stress overload that can cause the part to break. When tightening, improve the function of mold attaching, and easily achieve a good shape of the punch, which is beneficial to improve the degree of deformation of the part.

    (3) Part of the feeding resistance on the pressing surface should be uniform. Uniform deep drawing is a condition to ensure uniform feeding resistance of each part of the pressing surface. The feeding resistance of each part of the pressing material surface is uniform, which is an important guarantee to ensure that the stretched part does not wrinkle or crack.

    2. In order to complete the drawing, reasonably increase the feeding process, and often add process supplements on the basis of the workpiece, so as to achieve a satisfactory stretching effect.

    The advantages and disadvantages of technical supplements are important signs of the drawing level of the tensile parts. Reasonable addition of technical supplements should meet the following three requirements:

    (1), process drawing requirements.

    (2) Requirements for pressing material.

    (3) Trimming and flanging are required after stretching.

    2. What is the effect of multiple stretching on the stretched parts?

    1. Multi-stretching greatly improves the qualification rate in the production process of the product, and it is not easy to produce waste products, because the stress is relieved in the middle after multiple stretching, and the annealing softens.

    2. Repeated stretching ensures the precision of the product and greatly improves the elongation coefficient and production efficiency.

    3. Due to the high technical content of one-time forming, multiple stretching can increase the uniformity and reduce the product scrap rate.

    Third, pay attention to the selection of automotive tensile parts

    (1) The standard mold base should be selected as much as possible for the production of drawing parts. The type and specification of the standard mold base determine the type and specification of the upper and lower mold bases.

    (2) The selected or planned mold base must be adapted to the relevant dimensions of the selected press table and related sliders, and the necessary inspections must be carried out. If the small shaping size of the lower die base should be at least 40~50mm larger than the size of the leakage hole of the press table.

    (3), choose large-scale precision mold mold base ZG35.ZG45.

    (4) The parallelism of the upper and lower parts of the die base should meet the requirements, and the parallelism is generally grade 4.

    (5) The upper and lower die base guide sleeves and guide post device holes must be common, and the accuracy is generally required to be below ±0.02mm; the axis of the die base guide post. The axis of the guide sleeve device hole should be straight with the upper and lower planes of the die base. For matching, the axial direction of the device guide post and guide sleeve device should be the same as the upper and lower plane pens of the die base. The device guide post generally requires level 4.

    (6) The roughness of the upper and lower surfaces of the mold base is Ra1.6~0.8μm, if the parallelism can be guaranteed, it can be reduced to Ra3.2~1.6μm. The function of the gasket is to directly accept and disperse the pressure transmitted by the punch, reduce the unit pressure of the punch, and prevent the die seat from being pressed in. The shape and size of the backing plate is the same as that of the die, and the fixing method is fixed with screws and pins.

    The above is related to the processing of automobile drawing parts. The processing of drawing parts must meet the performance and technical performance of the product, and at the same time, it must be assembled and repaired, so as to make full use of metal materials, reduce the types and standards of data, and minimize The consumption of data, when qualified, select the information with lower price, and try to make the parts as waste-free and waste-free as possible. Hope the above content is helpful to readers.

    Read More →
  • How to deal with common problems in drawing parts processing?

    By : Categories : Blog,Industry Comment: Comments Off on How to deal with common problems in drawing parts processing?

    For the above problems, we should reduce the adhesive wear and change the characteristics of the contact pair before reaching it. Let’s analyze it briefly.

    1. In terms of raw data of the formed workpiece, the raw data after surface treatment, such as phosphating raw data, spraying or other appearance treatments, form a layer of non-metallic mold on the surface of the forming data. This method is usually costly and requires the addition of additional production equipment and increased production procedures. Although this method sometimes produces some effects, it is rarely used in actual production.

    2. Between the metal parts and the mold, adding a layer of PVC film between the mold and the molding data can sometimes solve the problem of workpiece strain. In terms of the organization of the production line, in terms of continuous supply of film, in terms of cyclical production, each time a workpiece is produced, a layer of film needs to be added to affect the production speed. This method is usually expensive and also generates a lot of waste. For the production of small batches of large workpieces, this method of production is desirable. When some forming loads are small, adding lubricating oil or adding EP enhancer lubricant can solve the problem of workpiece strain.

    3. Modification of mold convexity, surface treatment of concave mold material or convex and concave mold, or selection of appropriate mold material, so that the stretched material looks like the contact properties of convex and concave molds have changed. From the practical point of view, this is an economical and practical treatment method, which has been widely used. In short, there are many ways to deal with the surface strain of deep-drawn parts and punches and punches and concave dies. The specific method should be based on the size of the workpiece and the load, the type of material to be processed in the production batch, etc.

    The shape of the workpiece of the drawing part is complex and diverse, and the dimensional accuracy is required to be high. The processed product is flush with the processed product, and the processed cut surface is very flat and smooth. Compared with other processing techniques, it can process high-precision gear punching parts with very small modulus, and the drawn parts have clear contours and small concave angles.

    During processing, drawing parts mainly rely on press pressure to stamp metal or non-metal materials. During the processing of drawn parts, the precision of the workpiece is very high, which can reach the micron level. Compared with other machined parts, this product has obvious advantages: light, thin, well-distributed and pressure-resistant. In the process of processing, mass production can be carried out, the processing time can be shortened, and it can be formed in one place without other processing. This product is mainly used in automobile handbrakes, cars, motorcycles and other products. It is an economical and efficient mechanical and electrical product parts.

    Next, we will promote some questions about stretched parts for you so that you can get a clear understanding of them through study. In this way, you can add some expertise to the products on this website.

    1. Blanking-drawing, is it suitable for shallow drawing or deep drawing?

    Blanking – drawing, suitable for shallow drawing parts, because the steel plate is pressed when blanking, and the steel plate is also pressed when deep drawing. Therefore, on this basis, there will be the above-mentioned corresponding theories. And, there is no doubt about that.

    2. How to wire the tie rod?

    In this case, in the view of the drawn parts manufacturer without PAX, it cannot use the normal thread rolling method because it is not applicable, but first thread a mandrel on the tie rod, and then perform the thread rolling operation, In this way, the work can be successfully completed.

    3. How to prevent the problem of pulling the rod?

    In order to prevent hair pulling problems, we can take methods, and perhaps should pay attention to the aspects. There are mainly the following aspects:

    First, the appearance of the die used should be smooth, and it should be smooth when stretched;

    Second, the hardness of the mold material is too low.

    Third, it is necessary to clean the stretched parts. There must be no dust and dirt on it.

    The above is the related content of drawing parts processing. For extruded parts, the above problems are related. So based on that, I hope you take it seriously and implement it and know how to respond properly. In this way, even if you encounter it in actual work, you can deal with it calmly, deal with it in time, and then avoid some unnecessary problems or troubles. May the above content be helpful to readers.

    Read More →
  • Drawing parts processing standards and process precautions

    By : Categories : Blog,Industry Comment: Comments Off on Drawing parts processing standards and process precautions

    1. Processing standard of drawing parts

    Stretching parts are workpieces obtained by stretching and deforming the sheet by mechanical equipment. Now Xiaobian will introduce the production standards of our stretching parts for you.

    1. The first-wall surface, bottom surface and wall surface of the deep-drawing part, and the corner radius of the four corners of the rectangular part should be appropriate. mm2rd1, mm5.1r2d.

    2. The shape of the stretched part should be simple and symmetrical, and it should be stretched at one time as much as possible.

    3. For parts that need to be stretched many times, on the premise of ensuring the required surface quality, traces that may be produced on the inner and outer surfaces should be allowed.

    4. On the premise of ensuring the assembly requirements, the side wall of the deep drawing part should be allowed to have a certain slope.

    5. The dimensions of the deep-drawn parts should be marked with their outer or inner dimensions, and the inner and outer dimensions should not be marked at the same time. With trapezoidal deep-drawing parts, the dimension in the height direction should generally be based on the bottom. If the upper part is the benchmark, the height dimension is not easy to guarantee.

    6. The distance from the hole on the bottom or flange of the deep drawing piece to the side wall should be appropriate.

    2. Precautions when using tensile parts

    As we all know, tensile parts are prone to residual stress during machining, and there is a high residual stress near the yield limit. Most residual stresses have significant adverse effects on components, such as reducing their actual strength, fatigue limit, stress corrosion and brittle fracture. Due to the relaxation of residual stress, the parts are warped, which greatly affects the dimensional accuracy of the parts. So, what should we pay attention to when working with extruded parts? Let our stretched parts manufacturers explain it to you.

    1. Regularly check the turntable and die mounting seat of the punch press to ensure the coaxial accuracy of the upper and lower turntables.

    2. Before using stretch metal stamping parts, it is necessary to strictly inspect, clean up dirt, and carefully check that the guide sleeve and mold of stretch stamping parts are well lubricated.

    3. In order to ensure the service life of the drawing and punching parts, the die spring should be replaced regularly to prevent the spring from fatigue damage and affect the use of the drawing and punching parts.

    4. When installing the mold, the puncher should use softer metals (such as copper, aluminum, etc.) to make operating tools to prevent damage to the drawing punch during the installation process.

    5. When the punch and die edge of the pulling and pressing part are worn, they should be stopped immediately and ground in time, otherwise the wear degree of the die edge will be rapidly expanded, the die wear will be accelerated, and the quality of the stamping parts and the life of the die will be reduced.

    6. According to the installation procedure of the mold, install the convex and concave mold on the turntable to ensure that the direction of the convex and concave stretched stamping parts is consistent, especially the direction requirements (non-circular and square), to prevent installation errors and reverse installation.

    3. Precautions and uses for the processing process of drawing parts

    Have you ever wanted to ask how much you know about the accessory product of tensile parts? I am afraid that few people know what this accessory is used for and how it is processed. This kind of drawing part is a shaped slab or hollow part drawn to make various open stamping parts. This kind of workpiece often appears in our daily life, but we have not really understood the purpose and function of the product. Next, we will introduce you to the production process considerations and performance aspects of stretched parts.

    Due to the special production process of wire drawing, this production method can be made into thin-walled parts with complex shapes such as cylinder, box and spherical. Rally has its unique production method in tractors, electrical appliances, electronics and other industrial and daily necessities, so it has a considerable position. If the drawing parts are used as installation and processing items, if there is any missing or missing, it will cause the valve to lose control and damage the piston and other workpieces, and if it is used in the case of missing installation, it will cause serious failure, which is also a detail to pay attention to. question.

    Unturned tire casings stacked for a long time will be deformed by squeezing. If a squeeze condition occurs, the filtering effect is not reliable. Therefore, we need to pay attention to all aspects of our workflow and daily routines so that the stretched products we produce are fully functional.

    The above is the processing standard and process description of drawing parts. Everyone should know about it. Therefore, the manufacturer of tensile parts reminds you that only the correct treatment of tensile products can play an important role in its performance. In addition, the service life is also highly ductile. I hope the above will be helpful to readers.

    Read More →