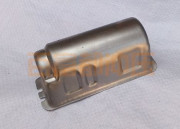
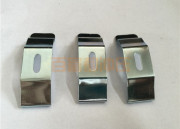
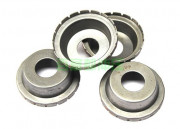
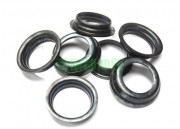
Zhejiang Balford Mechatronics Co., ltd focus on difficult stamping & deep drawing. Main product: motor housing and difficult custom deep drawn stampings.

  • What are the effects of mold temperature on injection molding?

    By : Categories : Blog,Industry Comment: Comments Off on What are the effects of mold temperature on injection molding?

    1. The influence of mold temperature on injection molding

    1. Mold temperature is a variable in injection molding. No matter what kind of plastic is injected, it is necessary to ensure that the surface of the mold is basically wet. The hot mold surface keeps the plastic surface liquid long enough to build pressure within the cavity. Reproduction of the cavity surface is high if the cavity is filled and the cavity pressure can press the soft plastic against the metal before the frozen skin hardens. On the other hand, if the plastic entering the cavity at low pressure is suspended, no matter how short, its slight contact with the metal can cause smearing, sometimes called gate smearing.

    2. For each plastic and plastic part, there is a limit on the surface temperature of the mold, beyond which one or more adverse effects may occur (for example: components can overflow burrs). Higher mold temperatures mean less resistance to flow. On many injection molding machines, this naturally means faster flow through gates and cavities, since the injection flow control valve used does not correct for this change, faster filling results in higher efficiency in sprues and cavities pressure.

    3. It may cause flash burrs. Since the hotter model does not freeze the plastic that entered the flash edge area prior to high pressure buildup, the melt can flash around the ejector pin and spill into the parting line gap. This shows the need to have good injection rate control, which some modern flow control programmers do.

    4. The increase in mold temperature will reduce the condensation layer of plastic in the cavity, making the molten material flow more easily in the cavity, resulting in greater part weight and better surface quality. At the same time, the increase in mold temperature will also increase the tensile strength of the part.  

    Read More →
  • What are the main reasons that affect the machining accuracy of molds?

    By : Categories : Blog,Industry Comment: Comments Off on What are the main reasons that affect the machining accuracy of molds?

    1. What are the main reasons that affect the machining accuracy of molds?

    1. Dimensional accuracy

    It refers to the consistency between the actual size of the processed part and the center of the part’s dimensional tolerance zone. Dimensional accuracy is controlled by dimensional tolerances. Dimensional tolerance is the allowable variation in part size during cutting. When the basic dimensions are the same, the smaller the dimensional tolerance, the higher the dimensional accuracy.

    2. Shape accuracy

    Refers to the consistency of the actual geometry and ideal geometry of the surface of the part after machining. Items for evaluating shape accuracy include 6 items such as straightness, flatness, roundness, cylindricity, and line profile. Shape accuracy is controlled by shape tolerance. Except for the 13 precision grades of roundness and cylindricity, each shape tolerance is divided into 12 precision grades, and the rest are divided into 12 precision grades. Level 1 is higher, level 12 is lower.

    3. Position accuracy

    Refers to the actual position accuracy difference of the relevant surface of the part after machining. Items for evaluating position accuracy include parallelism, perpendicularity, inclination, coaxiality, symmetry, positional degree, circular runout, and full runout. Position accuracy is controlled by position tolerance, which is also divided into 12 accuracy levels for each item.

    4. Relationship between dimensional accuracy, shape accuracy and position accuracy

    Usually, when designing mechanical parts and specifying the machining accuracy of the parts, attention should be paid to controlling the shape error within the position tolerance, and the position error should be smaller than the dimensional tolerance. That is, the important surface of precision parts or parts should be higher than the positional accuracy, and the positional accuracy should be higher than the dimensional accuracy.   

    Read More →
  • How to identify the advantages and disadvantages of incoming mold materials during mold design and processing?

    By : Categories : Blog,Industry Comment: Comments Off on How to identify the advantages and disadvantages of incoming mold materials during mold design and processing?

    Second, uneven

    B. The appearance of fake and inferior mold materials often has pockmarked surface. The pitted surface is the irregular unevenness on the surface of the incoming mold due to the serious wear of the rolling groove. Because the manufacturers of counterfeit and shoddy molds want to pursue profits, the rolling of the grooves often exceeds the standard.

    3. Material

    C. Fake and inferior molds are prone to scarring on the surface of incoming materials.

    1. The material of the fake and inferior mold is uneven and there are many impurities.

    2. Fake and inferior materials have simple equipment and are easy to stick to steel. These impurities are prone to scarring after biting the roll.

    4. Cracks

    D. The surface of the fake and inferior material is prone to cracks, because its blank is adobe, and the adobe has many pores, and the adobe is subjected to thermal stress during the cooling process, resulting in cracks. After rolling, there are cracks.

    5. Scratch

    E. Fake and inferior mold materials are easy to be scratched, because the fake and inferior materials manufacturers have simple equipment, which is easy to produce burrs and scratch the surface of mold materials. Deep scratches reduce the strength of the incoming mold.  

    Read More →
  • What is the cause of the tensile die strain and what is the solution?

    By : Categories : Blog,Techniques Comment: Comments Off on What is the cause of the tensile die strain and what is the solution?

    The cause of the injury

    1. Between the workpiece and the mold

    Adding a film such as PVC between the mold and the molding material can sometimes solve the problem of workpiece strain. For the production line, the film can be continuously provided by the mechanism. For the stamping equipment of periodic production, each workpiece needs to add a layer of film, which affects the production efficiency. This method is generally expensive and also produces a large amount of waste. For small batches of large workpieces Production is desirable.

    2. Raw materials for forming workpieces

    By surface treatment of the raw material, such as phosphating, spraying or other surface treatment, a non-metallic mold layer is formed on the surface of the material to be formed, which can greatly reduce or eliminate the strain of the workpiece. This method is often more expensive. high, and requires the addition of additional production equipment and increased production processes.

    3. Mould

    By changing the convex and concave ink materials of the mold or surface treatment of the convex and concave molds, the secondary properties of the contact between the finished material and the convex and concave molds are changed.

    Second, the solution

    1. There are many ways to solve the problem of surface strain of workpiece and mold convex and concave mold. For different situations, the application method needs to be selected according to the size of the workpiece and the load, the production batch, the type of processing material, etc.

    2. Using cemented carbide as the mold material, the chemical vapor phase of the convex and concave surface of the mold is deposited. TD is usually a cladding treatment. TD coating treatment is cost-effective.

    Well, the above is what is the solution to the cause of the stretching die strain? I hope the above content can help readers.

    Read More →
  • How to choose stamping and drawing die materials?

    By : Categories : Blog,Industry Comment: Comments Off on How to choose stamping and drawing die materials?

    1. Selection of drawing die materials

    1. The selection of stamping and drawing die materials should consider the batch production of the workpiece. If the batch is small, there is no need to choose a mold material with a long life; the material of the stamping workpiece should also be considered, and the mold materials suitable for different materials are also different.

    2. For stamping and drawing dies, wear resistance is an important factor determining the life of the die. The wear resistance of steel depends on the state of hard spots such as carbides and the hardness of the matrix. The higher the hardness of the two, the higher the number of carbides, the better the wear resistance.

    3. The advantage of poor wear resistance of commonly used stamping die steel is carbon tool steel – alloy tool steel – base steel – high carbon and high chromium steel – high speed steel – steel bonded carbide – carbide.

    4. The selection of the drawing die material must consider the thickness, shape, size and precision requirements of the workpiece.  

    Well, the above is related to the selection of stamping and drawing die materials. I hope the above content can help readers.

    Read More →
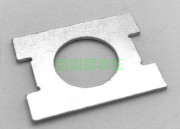
  • Solenoid valve gasket

    By : Categories : deep drawing,deep drawn aluminum Comment: Comments Off on Solenoid valve gasket

    Solenoid valve gasket

    1. Manufacturing process: 6061 aluminum coil, fine blanking

    2. Application range: Solenoid valve gasket, Solenoid valve gasket

    3. Stamping material: aluminum plate 6061

    4. Surface treatment: none

    5. Dimensions: Outer diameter 22*26, thickness 1mm, other dimensions can be customized according to your company’s requirements, the unit price is negotiable.

    6. Product features: there is no burr on the end face, and the appearance is bright

    7. Quality: Strictly control the production quality, the products are fully inspected before they are shipped, and the products must be inspected before leaving the factory to ensure that every process meets the requirements and quality problems.

    Quality comes from details, confidence comes from customers’ evaluation of our evaluation, in order to let you buy better products , strive to perfect every detail, from accessories to craftsmanship, are devoted to the pursuit of quality by Balford people.

    Read More →
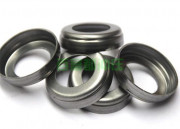
  • Automobile gearbox bearing housing

    By : Categories : deep drawing,deep drawn stainless steel Comment: Comments Off on Automobile gearbox bearing housing

    Automobile gearbox bearing housing
    1. Manufacturing process: No. 50 steel is annealed twice, deep-drawn, punched, and chamfered

    2. Scope of application: inner and outer rings of automobile gearbox bearings

    3. Stamping material: No. 50 steel

    4. Surface treatment: normalizing and quenching

    5. Size specifications: The size can be customized according to your company’s requirements, and the unit price is negotiable with our company.

    6. Product features: no burrs on the end face, flat head chamfering, parallel and vertical cut surfaces, bright appearance

    7. Quality: Strictly control the production quality, the products are fully inspected before they are shipped, and the products must be inspected before leaving the factory to ensure that every process meets the requirements and quality problems.

    Quality comes from details, and confidence comes from customers’ evaluation of us. In order to let you buy better products, we strive to improve every detail, from accessories to craftsmanship.

    Read More →
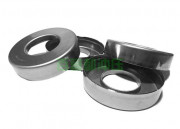
  • Automobile shock absorber plane pressure bearing inner and outer rings

    By : Categories : deep drawing,deep drawn stainless steel Comment: Comments Off on Automobile shock absorber plane pressure bearing inner and outer rings

    Automobile shock absorber plane pressure bearing inner and outer rings
    1. Manufacturing process: No. 50 steel is annealed twice, deep-drawn, punched, and chamfered

    2. Scope of application: Honda shock absorber plane pressure bearing inner and outer rings

    3. Stamping material: No. 50 steel

    4. Surface treatment: normalizing and quenching

    5. Size specifications: The size can be customized according to your company’s requirements, and the unit price is negotiable with our company.

    6. Product features: no burrs on the end face, flat head chamfering, parallel and vertical cut surfaces, bright appearance

    7. Quality: Strictly control the production quality, the products are fully inspected before they are shipped, and the products must be inspected before leaving the factory to ensure that every process meets the requirements and quality problems.

    Quality comes from details, and confidence comes from customers’ evaluation of us. In order to let you buy better products, we strive to improve every detail, from accessories to craftsmanship.

    Read More →
  • What requirements do stamping and drawing dies need to meet when drawing?

    By : Categories : Blog Comment: Comments Off on What requirements do stamping and drawing dies need to meet when drawing?

    1. Requirements for stamping and drawing dies

    1. Under the condition of ensuring normal use, the designed stamping and drawing die should reduce the dimensional accuracy level and surface roughness level as much as possible, which is conducive to product exchange, reducing waste and ensuring product quality stability.

    2. The design of the stamping and drawing die must meet the use and technical performance of the product, and it is easy to assemble and repair.

    3. The design of stamping and drawing dies must be conducive to improving the utilization rate of metal materials, reducing the variety and specifications of materials, reducing the consumption of materials as much as possible, using low-cost materials where possible, so that the parts are as free of waste as possible and reduce Scrap blanking.

    4. The design of stamping and drawing dies should be as beneficial as possible to the processing of existing equipment, process equipment and technological processes, and to prolong the service life of stamping dies.

    5. The design of stamping and drawing dies must be simple in shape and reasonable in structure, which is conducive to simplifying the structure of the die and simplifying the number of processes, that is, to complete the entire part processing with less and simple stamping processes, reducing other methods, which is conducive to stamping operations and facilitates organization and realization Mechanized and automated production to increase labor productivity.

    6. Stamping and drawing dies can produce good products. Therefore, in the design of stamping and drawing dies, the design must be strictly followed to avoid the design and loss of stamping and drawing dies!  

    Read More →
  • What are the forms of stamping and drawing dies?

    By : Categories : Blog,Industry Comment: Comments Off on What are the forms of stamping and drawing dies?

    1. The form of stamping and drawing dies

    1. Formal features

    The surface of the punched workpiece is relatively flat to provide conditions for our subsequent processing.

    2. Flip-chip features

    It is very convenient to operate and has a wide range of applications, but the flatness of the workpiece surface is relatively poor, and the tension on the punch and die is relatively large, so the wall thickness of the punch and die should be strictly controlled to avoid insufficient strength.

    After analysis, it is very inconvenient to operate the workpiece if it adopts a formal-type conforming mold. In addition, the workpiece has higher straightness requirements and relatively low workpiece accuracy requirements, so it is easy to operate. Considering the simplicity of mold manufacturing and other aspects, it was decided that the second, third and fourth deep drawing should be inverted, and the first deep drawing should be formal.

    Through the above introduction, we can understand that there are two forms of stamping and drawing dies, which are formal and inverted, and different forms should be selected according to different production processes.

    Read More →
  • What is the reason for the die processing of the drawing die?

    By : Categories : Blog,Techniques Comment: Comments Off on What is the reason for the die processing of the drawing die?

    During the processing of the drawing die, if the die clamping is not flexible enough, or there is a stuck situation, then the production should be stopped immediately, and the main reason for the stuck die should be found out and troubleshoot. Otherwise, it may expand the failure, resulting in mold damage.

    First, the main reasons for the card mold are:

    The mold is poorly guided and tilted. And there are foreign objects in the template, so that the template cannot be flatly attached; there is a problem with the strength design of the mold or uneven force. It will lead to the deformation of the mold, such as the hardness and thickness of the mold base and the template are too small, and it is very easy to be deformed by external force; the mold position is not installed correctly, and the positioning error of the upper and lower molds is too poor. Or the precision of the press is too low, causing the mold to interfere; the strength of the punch is low, and the position of the large and small punches is too close, which makes the lateral force of the mold unbalanced. At this time, the strength of the punch should be increased, and the guidance and protection of the stripper plate should be strengthened.

    The above has explained the reasons for the occurrence of card molds in the processing of drawing molds, and different reasons will have different solutions, so we need to solve the problems in a targeted manner.

    Read More →
  • How to choose the positioning method of stamping and drawing dies?

    By : Categories : Blog,Industry Comment: Comments Off on How to choose the positioning method of stamping and drawing dies?

    1. Blocking pin

    The function of the stopper pin is to use the strip to overlap or punch the outline to limit the feeding distance of the strip. There are three common types of stopper pins in national standards: fixed stopper pins, movable stopper pins, and initial stopper pins. The fixed stopper pin can be easily installed on the bottom die and can be used to control the feeding distance of the strip. It features simple structure and convenient processing. Because it is installed on the die, the mounting hole may also weaken the strength of the die, and the commonly used structures have similar circular and hook-shaped retaining pins. Active stop pins are often used in flip-chip composite molds. The start stop pin is used to start positioning in the progressive die.

    Second, the guide pin

    Guide pins are often used in conjunction with stop pins in progressive dies to minimize positioning errors and ensure the relative position dimensional accuracy requirements of holes and shapes. When there is no hole suitable for the guide pin on the part, for the progressive die with too many processing steps and high part accuracy requirements, process holes should be set in the vacancies on both sides of the strip to guide the pin. Use straightening strips. At this time, the guide pin is fixed on the punch fixing plate or the elastic pressure stripper.

    Three, side edge

    In the progressive die, the side edge is often used to control the step distance of the strip, so as to achieve the purpose of accurate positioning. The side edge is actually a punch for cutting edge material, using the edges on both sides of the side edge to cut off the material on both sides of the strip to form a step. After the strip is cut off part of the edge material, the width can continue to be fed to the die, and the feeding distance is the cut length. When the material is sent to the step formed after cutting, the side edge stopper prevents the material from continuing to feed, and a new feeding step can be formed only after the next work of the mold.

    Fourth, the positioning plate and positioning nails

    Positioning plates and positioning pins are all components used for positioning a single blank to ensure the relative position accuracy of the front and rear processes or the position accuracy requirements of the inner hole and outer contour of the workpiece.

    5. Control of feeding direction

    The feeding direction of the strips is the guide plate with the strips on the side, and the feeding is guided along the designed feeding direction to make the strips close to the guide plate on one side to ensure the accuracy of the feeding, and a side pressure device can be used. Since the stamping and drawing die adopts the cover-shaped semi-finished product that is drawn out of the sheet for the first time, the material can be positioned by the blank holder in the die.

    The editor added: The correct position must be accurately guaranteed by relying on its own positioning parts. Due to the different forms of blanks and the different structures of the stamping and drawing dies used, there are many types of positioning parts. The design should be selected according to the form of the blank, the structure of the stamping and drawing die, the tolerance of the parts, and the production efficiency.

    Through the above introduction, let’s briefly introduce that we have a good understanding of the positioning of the stamping and drawing die, and the selection of its positioning method is selected according to the positioning parts, which I hope we can understand.

    Read More →
  • How to solve the rust of the drawing die

    By : Categories : Blog,Industry Comment: Comments Off on How to solve the rust of the drawing die

    First, the cause of mold rust

    There are three main reasons for mold rust:

    1. The product of the decomposition of the molding material.

    2. The resurgence of molds.

    3. Sweaty hands.

    Second, the relevant analysis of mold rust

    1. The products (gas, residue) decomposed by the forming material are also very common to the corrosion of the mold. In order to prevent the mold from rusting, we generally use chrome plating on the mold cavity, but the chrome plating treatment cannot completely solve the problem. Because decomposing organisms also corrode the deep part of the pin hole. And these places are places where there is no way to plate them.

    2. When the mold is cooled below the moisture regain point, the moisture in the air will regain moisture on the mold surface and produce water droplets, which will lead to rust.

    3. Solve the problem of mold rust

    1. Short-term: wipe the surface of the mold cavity with a cloth by hand. Fully dry the molding material, reduce the temperature of the barrel, and prevent the material from decomposing. When temporarily stopping molding, spray rust inhibitor into the mold cavity, and then close the mold.

    2. Long-term: Turn the product material into a material that will not be corroded by decomposition products. Materials that are easily decomposed include PVC, POM, EVA, PC, and foam. Since the decomposition products have a corrosive effect on the mold, if the plastic raw material cannot be replaced, the mold should be chrome-plated. When the mold is not used for a long time, apply a layer of butter to the outside of the mold and the movable parts.

    Read More →
  • Automobile clutch release bearing inner and outer rings

    By : Categories : deep drawing,deep drawn stainless steel Comment: Comments Off on Automobile clutch release bearing inner and outer rings

    Automobile clutch release bearing inner and outer rings

    1. Manufacturing process: No. 50 steel is annealed twice, deep-drawn, punched, and chamfered

    2. Scope of application: Volkswagen release bearing inner and outer rings

    3. Stamping material: No. 50 steel

    4. Surface treatment: normalizing and quenching

    5. Size specifications: The size can be customized according to your company’s requirements, and the unit price is negotiable with our company.

    6. Product features: no burrs on the end face, flat head chamfering, parallel and vertical cut surfaces, bright appearance

    7. Quality: Strictly control the production quality, the products are fully inspected before they are shipped, and the products must be inspected before leaving the factory to ensure that every process meets the requirements and quality problems.

    Quality comes from details, confidence comes from customers’ evaluation of our evaluation, in order to let you buy better products , strive to perfect every detail, from accessories to craftsmanship

    All are devoted to the pursuit of quality by Balford people.

    Read More →
  • Auto release bearing inner and outer rings

    By : Categories : deep drawing,deep drawn stainless steel Comment: Comments Off on Auto release bearing inner and outer rings

    Auto release bearing inner and outer rings

    1. Manufacturing process: 65mn annealed material twice, deep drawing, punching, flat head chamfering

    2. Scope of application: Volkswagen release bearing inner and outer rings

    3. Stamping material: 65mn

    4. Surface treatment: normalizing and quenching

    5. Size specifications: The size can be customized according to your company’s requirements, and the unit price is negotiable with our company.

    6. Product features: no burrs on the end face, flat head chamfering, parallel and vertical cut surfaces, bright appearance

    7. Quality: Strictly control the production quality, the products are fully inspected before they are shipped, and the products must be inspected before leaving the factory to ensure that every process meets the requirements and quality problems.

    Quality comes from details, confidence comes from customers’ evaluation of our evaluation, in order to let you buy better products , strive to perfect every detail, from accessories to craftsmanship

    All are devoted to the pursuit of quality by Balford people.

    Read More →