Blog

Zhejiang Balford Mechatronics Co., ltd focus on difficult stamping & deep drawing. Main product: motor housing and difficult custom deep drawn stampings.

  • How to process precision mechanical parts to meet the precision requirements?

    By : Categories : Blog,Industry Comment: Comments Off on How to process precision mechanical parts to meet the precision requirements?

    Enterprise personnel engaged in precision machining know that in order to process a reasonable precision hardware, in addition to purchasing precision processing equipment, precision testing instruments are also essential, including three-dimensional, altimeter, hardness tester, micrometer, etc.

    Three-dimensional measuring instrument: It is mainly an instrument for measuring precision mechanical parts by taking three-dimensional points. The three-dimensional is also commonly known as the three-dimensional coordinate. The reason is that the measured workpiece is placed in the three-dimensional measurement space, and the coordinate position of each measuring point on the measured object can be obtained. The measurement personnel can calculate the spatial coordinate value of these points. The geometric size, shape and position of the measured object.

    The three-dimensional measurement principle is stated above, so which positions can it be used for? It can measure the size of spherical shape, cylindrical shape, conical shape, etc., and can also measure the curve. After software analysis, the size is digitized, displayed in numbers, and then the computer is used for geometric processing, which can be beneficial to better. Control the precision of machining precision mechanical parts.

    Altimeter: An instrument used to measure the height of a spatial point relative to the ground. It can measure the height, depth, groove width, inner and outer diameter, hole center distance, shaft center distance, flatness, verticality, etc. of precision mechanical parts. When measuring, the height gauge and the scribing claw should be matched reasonably so that the line drawn on the workpiece is parallel to the platform, and the height gauge should be matched with the lever dial indicator, which can reduce the measurement error.

    Hardness tester: Literally, it is a test instrument for measuring the hardness of a material, indicating the ability of a material to resist the pressing of a hard object into its surface. High hardness also indicates good wear resistance.

    Finally, the precision machining manufacturer Shilihe Electromechanical Equipment Co., Ltd. reminds you: the three-dimensional, altimeter, these precision instruments have certain requirements for the ambient temperature and humidity, the best working environment: temperature (20±2) ℃, The humidity is 55%-65%, the purpose is to ensure the accuracy of the data.

    Read More →
  • Why do you need to spray the protective punching mesh?

    By : Categories : Blog,Industry Comment: Comments Off on Why do you need to spray the protective punching mesh?

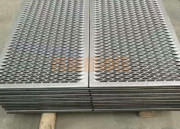
    The principle of punching molding spray technology is that when the plastic powder is charged by a high-voltage electrostatic device, and under the action of an electric field, the paint is sprayed on the surface of the punching mesh, and the powder will be uniformly adsorbed on the surface of the punching mesh to form a powdery coating.

    The powder coating is leveled and solidified after being baked at high temperature, and the plastic particles will melt into a dense final protective coating with various effects; it is firmly attached to the surface of the perforated mesh.

    Electrostatic powder spraying is used for punching forming mesh spraying, and powder spraying uses electrostatic generators to make plastic powder charged with electricity. Adsorbed on the surface of the iron plate, baked at 180°C to 220°C, and the powder is melted and attached to the metal surface.

    The punching and forming mesh is sprayed with plastic, which has no pollution to the environment and no harm to the human body. The characteristics of spray plastic are bright appearance, higher strength and mechanical strength, and higher corrosion resistance and wear resistance. The colors of spraying are white, blue, green, silver, yellow, etc.

    Read More →
  • How to adjust the production of precision metal stamping parts?

    By : Categories : Blog,Industry Comment: Comments Off on How to adjust the production of precision metal stamping parts?

    1. The adjustment method is: first turn the material thickness adjustment disk clockwise, and pull the material belt with one hand. If the material tape can be pulled out, it needs to be slowly turned counterclockwise until the material cannot be pulled out, then turn the two small grids counterclockwise, and then tighten the screw. If the material cannot be pulled, but the clockwise or counterclockwise rotation of the material thickness adjustment dial is relatively loose, use your fingers to slowly and gently turn clockwise, but do not use force. Turn the two small grids counterclockwise until they can’t turn, and then tighten the screws. The same goes for the adjustment of the retaining clips.
    2. After adjusting the material thickness of the moving splint, the flywheel of the punch press needs to be rotated 90 degrees clockwise. During this period, it is necessary to check whether the moving splint is in a clamped state. Adjust the material thickness of the retaining clip by 90 degrees. First turn on the main switch for clamping and loosening the feeding clip, place 1.5T material at the material thickness adjustment plate of the moving clip, hold up the moving clip material block without clamping the material, then pass the material through the fixed clip, and then clamp the feeding clip Tighten the main switch and turn it off, and then adjust the thickness of the fixed clip material according to the method of adjusting the thickness of the moving clip material.

    3. After the distance is adjusted, turn on the main switch for clamping and releasing the feeding clip, remove the material placed on the material thickness adjustment plate of the moving clip, and move the flywheel of the punch press away from the upper mold stripping plate to guide the needle into the lower mold to float. When the pin hole is 2/3, adjust the feeding machine relaxation time.

    4. When the straight section of the guide needle is about to leave the material belt when the punch is shaken through 180°, it is necessary to check whether the fixing clip is clamped at this time.

    Read More →
  • How to cut sheet metal parts?

    By : Categories : Blog,Techniques Comment: Comments Off on How to cut sheet metal parts?

    The cutting process in sheet metal parts processing can not only change the style, but also deal with aspects such as thickness, so the effect of using it in different environments is also different. Therefore, cutting is the function of sheet metal parts changing their essence during processing, and we must know quite a few cutting methods.

    Electric welding, plasma cutting, laser cutting and other methods are more common, and laser cutting is used in the sheet metal processing process. This is because the hardness of sheet metal is relatively hard, so choosing laser cutting is also a better choice when processing.

    When using laser cutting, the section is relatively neat and clean. It will be simpler to dispose of in the later stage, and it will be more suitable when used. When using it, there will be no inconsistency in the environment, and the effect that can be exerted is quite large. Be very careful when cutting to avoid confusion on the cut side.

    Read More →
  • Why do automotive metal stamping parts cause tearing?

    By : Categories : Blog,Industry Comment: Comments Off on Why do automotive metal stamping parts cause tearing?

    Why do automotive metal stampings cause tearing? The quality of stamped products will lay a solid foundation for the appearance and performance of the vehicle. Therefore, the quality assurance of stamping parts has always been a problem that automobile manufacturers attach great importance to. In this article, the editor of Zhejiang Baifudu Electromechanical shares the reasons for the tearing of automotive metal stamping parts.

    The stamping process of common tearing and skewing of metal stamping parts is: blanking punching – punching incision – flanging forming – incision – flanging. There are many forms of tearing and skewing of the intermediate protective bracket during the forming process. The tearing parts are mainly distributed in the hole shape of the part, the junction of the R arc and the wall neck at the corner of the side wall, etc. Different, the proportion of each fracture site is different. The tear can be a one-time forming tear or a tear caused by a fatigue crack, i.e. invisible crack development.Analysis of the reasons, according to the actual situation on site, by checking the tearing position, fracture shape and crushing degree of the parts, it is believed that the tearing and skewing behavior of the parts is mainly reflected in the flanging forming process, and the reasons for this process phenomenon are as follows:

    The molding process parameters were not implemented correctly. In the forming process of the part, the process requires that the die, the pressing material core and the parts of the two must be closely attached together, and the forming is realized by the plastic deformation of the pressing plate when the machine tool slides down. However, due to the unstable quality of the pressed parts, it means that the pressure of the machine tool is in a state of unbalanced pressing during the production process. The main reason is that the processing technicians did not adjust the machine tool pressure in time according to the requirements of the process regulations at this stage, or did not communicate with each other about the stability of the machine tool pressure during the handover process. Every shift changes, resulting in poor and unstable parts quality.

    The common design defects of flanging forming molds for left/right parts with one mold and two cavities, in addition to flanging, also have shape forming content, and the finished parts are particularly complex, the bending surface is narrow, and the forming requirements of the concave mold core are consistent with the forming surface, resulting in The mold structure has a large forming stroke and a small pressing area. In the initial mold design, the designer only considered the small feature of the pressing surface, while ignoring the guiding sliding of the pressing core forming

    to make.

    Read More →
  • What should be paid attention to in the production process of stamping parts?

    By : Categories : Blog,Industry Comment: Comments Off on What should be paid attention to in the production process of stamping parts?

    n the production and processing of stamping parts, there are many problems that need to be paid attention to. In this article, the editor of Zhejiang Baifudu Electromechanical summarizes the six points that should be paid attention to in the production of stamping parts. Let’s take a look together!

    1. Regularly check the punch turntable and the die mounting base of the stamping parts to ensure the coaxial accuracy of the upper and lower turntables.

    2. Before installation and use of metal stamping parts, strict inspection should be performed to remove dirt, and carefully check whether the guide sleeve and die lubrication of deep drawing parts are good.

    3. In order to ensure the service life of the stamping parts, the spring of the mold should be replaced regularly to prevent the fatigue damage of the spring from affecting the use of the stamping parts.

    4. When the mold is installed, the stamping personnel should use soft metal to manufacture operating tools to prevent damage to the stamping parts caused by knocking and crushing during the installation process.

    5. When the punch and die edges of the stamping parts are worn, they should be stopped in time and sharpened in time, otherwise the wear degree of the die edges will be rapidly expanded, the die wear will be accelerated, and the quality of the stamping parts and the life of the die will be reduced.

    6. According to the die installation procedure, install the convex and concave die on the turntable to ensure that the direction of the convex and concave deep drawing stamping parts is consistent, especially the stamping parts with directional requirements should be carefully installed to prevent wrong installation and flipping.

    Well, the above is about “six points to pay attention to in stamping parts processing”, I hope the above content can help you.

    Read More →
  • Common problems and solutions in the production of metal stamping and drawing parts

    By : Categories : Blog,Techniques Comment: Comments Off on Common problems and solutions in the production of metal stamping and drawing parts

    Metal stamping parts and deep drawing parts can be seen everywhere in our daily life. During the mass production of metal stamped and deep drawn parts, various problems arise for various reasons. In this article, the editor of Zhejiang Baifudu Electromechanical shares the common problems and solutions in the production process of metal stamping and drawing parts.

    1. The shape and size of metal stamping and drawing parts do not match

    The main reason for the inconsistent shape and size of metal stamping and drawing parts is springback and inaccurate positioning. In addition to taking measures to reduce springback, the reliability of blank positioning should also be improved.

    2. Surface strain of metal stamping and drawing parts

    The surface strain of metal stamping and deep drawing parts is caused by improper material selection, low heat treatment hardness, poor finish, concave die fillet wear, poor surface quality of curved blanks, excessive material thickness, unreasonable process plan selection, and insufficient lubrication. of.

    3. Bending cracks in metal stamping tensile parts

    (1) When the angle between the bending line and the direction of the embossing of the sheet does not conform to the specified layout, when bending in a one-way V shape, the bending line should be perpendicular to the direction of the embossing; when bending in two directions, the bending The direction of bending and embossing is preferably 45 degrees.

    (2) The plasticity of the tensile material is poor.

    (3) The bending radius is too small and the pickling quality is poor.

    (4) Insufficient lubrication – larger friction.

    (5) The radius of the convex and concave die is worn or the gap is too small – the feeding resistance increases.

    (6) The quality of the shearing and punching sections of the stretched blank is poor – burrs, cracks.

    (7) The material thickness is seriously out of tolerance – feeding is difficult

    solution:

    1. The shape of metal stamping and drawing should be as simple and symmetrical as possible, and one deep drawing should be done as much as possible.

    2. For parts that need to be stretched multiple times, under the premise of ensuring the necessary surface quality, the inner and outer surfaces should have traces that may appear during the stretching process.

    3. Under the premise of ensuring the installation requirements, the side walls of the deep-drawn parts should have a certain slope.

    4. The distance from the edge of the hole at the bottom of the drawing piece or the flange to the side wall should be appropriate.

    5. The corner radius of the bottom and the wall, the flange and the wall, and the four corners of the rectangular piece should be appropriate.

    6. The scale marking of metal stamping and drawing parts cannot mark the internal and external dimensions.

    Read More →
  • What are the factors that affect the galvanizing of metal stampings?

    By : Categories : Blog,Techniques Comment: Comments Off on What are the factors that affect the galvanizing of metal stampings?

    1. The surface of metal stamping parts is not thoroughly cleaned, and a curing film is formed on the surface of stamping parts, which affects the normal deposition of electro-galvanizing.

    2. Stamping parts have high carbon content. High carbon steel and cast iron will reduce the hydrogen evolution potential, accelerate the hydrogen evolution on the surface of the workpiece, and reduce the electroplating efficiency.

    3. The stamping parts are bundled too tightly, and part of the surface is not plated in place during the galvanizing process.

    4. The content of additives in the galvanizing bath is low. Low additive content will affect the dispersibility of zinc, and the coating will appear too thin in some parts.

    5. Surface corrosion will also reduce the hydrogen evolution potential, accelerate the surface hydrogen evolution of stamping parts, reduce the current efficiency, and affect the deposition rate of zinc.

    6. Low sodium hydroxide content. Low sodium hydroxide content reduces current density and anode passivation.

    7. Anode passivation will reduce the effective area, thereby affecting the normal distribution of current.

    Well, the above is the relevant content about “What are the factors that affect the galvanizing of metal stamping parts?” I hope the above content can help you.

    Read More →
  • How to check hardware precision shrapnel?

    By : Categories : Blog,Techniques Comment: Comments Off on How to check hardware precision shrapnel?

    Hardware precision shrapnel is everywhere in life. It is a mechanical part that uses elasticity to work. Usually made of metal shrapnel steel. Hardware precision shrapnel is used to control the movement of machine parts, severe shock or vibration, store energy, measure force, etc. Hardware precision shrapnel is widely used in machine and appearance. There are many kinds of hardware precision shrapnel. Divided by shape, there are mainly spiral metal shrapnel, reel metal shrapnel, flat metal shrapnel, etc.

    First, the method of checking the hardware shrapnel

    Touch Check: Wipe the surface of the cover with a clean gauze. Inspectors should wear touch gloves and touch the surface of stamping parts longitudinally. This inspection method depends on the inspector’s experience. If necessary, you can sand the suspicious area with a whetstone and verify it, but this method is an effective and quick way to check.

    Polishing with elastic gauze: Wipe the surface of the cover with a clean gauze. The flexible sand screen is used to stick to the surface of the stamping part, and it is polished to the entire surface in the longitudinal direction, and any pitting and indentation can be easily found.

    Oiling check: Wipe the surface of the cover with a clean gauze. Then use a clean brush to evenly coat the entire surface of the metal stamping in the same direction. Check oiled stampings under bright light. It is recommended to erect the stampings in the direction of the body. With this method, it is easy to spot small pits, dimples and ripples on the stamped part.

    Whetstone grinding: first clean the surface of the outer cover with a clean gauze, then use a whetstone (20201000mm or larger) to polish, and use a relatively small whetstone (such as a 8100mm semi-circular whetstone) to polish it into a curved shape, which is not easy to touch. The particle size of the oil depends on the surface conditions (such as roughness, electroplating, etc.). Fine-grained petroleum is recommended. The grinding direction of the oil is basically vertical, matching the surface of the stamped part, and more parts can compensate for the lateral grinding.

    Read More →
  • What is the difference between large and small metal stamping parts?

    By : Categories : Blog,Industry Comment: Comments Off on What is the difference between large and small metal stamping parts?

    “Hardware stamping parts” refers to metal parts produced by physical processing such as forging, rolling, cutting, etc. of various metals such as iron, steel, and aluminum.

    “Large metal stamping parts manufacturing industry” refers to the general production equipment manufacturing from the mining and refining of metal materials to the manufacture of primary metal products, and then to the manufacture of special equipment for various industries in the national economy. The metal stamping parts industry mainly becomes products through the change, processing and assembly of the physical shape of metal raw materials.

    Most metal stamping products are not final consumer goods. However, as ancillary products, semi-finished products and tools used in the production process of industrial manufacturing, “small metal stamping parts” is not an existing industry category, but a cross combination of the above-mentioned metal products – metal stamping products.

    In the entire manufacturing industry, the responsibility of “small metal stamping parts” is to provide parts and production tools for manufacturing enterprises, not as end-use industry-specific equipment. Nevertheless, we cannot deny the important role of “small metal stamping parts” in the social production process: “small metal stamping parts” and the manufacturing industry are intertwined as an inseparable whole.

    The trend of industrial concentration in the metal stamping industry is obvious. At present, the domestic metal stamping industry is mainly concentrated in Guangdong, Zhejiang, Jiangsu, Shanghai, Hebei, Shandong and other economically developed provinces. The products of traditional metal stamping enterprises are relatively simple, and many enterprises only provide supporting facilities and accessories for other manufacturing enterprises. They are highly dependent on manufacturing companies and are slow to respond to market demands.

    Traditional metal stamping enterprises do not pay attention to the research and development of new products and the extension of the market, resulting in the lack of sustainable competitiveness of enterprises. In the face of increasingly specialized market demand and increasingly fierce competition, many metal stamping companies that have developed rapidly in the initial stage are feeling weak for the future.

    Read More →
  • Why do precision metal molds have substandard products?

    By : Categories : Blog,Techniques Comment: Comments Off on Why do precision metal molds have substandard products?

    1. Reasons for unqualified products of metal stamping parts

    1. The product is unqualified due to the springback of the material. At this time, we can reduce the springback of the stamping parts through the following methods, use the stamping material with stable mechanical properties, increase the annealing process, and use the correction bending. The material should be de-fired before bending, and the cooled material should be softened before bending; if it is difficult to eliminate the deformation during the stamping process, the slope of the model should be adjusted at this time.

    2. If there is a problem with the positioning of the strip due to the deformation and wear of the positioner, a new positioner must be replaced.

    3. When adjusting the press, if the low position of the slider is not adjusted well, the bending parts are not qualified.

    4. The pressing equipment of the mold does not have the function of pressing the material. It must be repaired or replaced with a new pressing spring or the pressing force must be adjusted.

    5. After a long time of use, some parts of the mold are loose, which causes the position of the abrasive tool to change.

    6. It may also be caused by the operator not using the mold as required.

    The above is why there are unqualified metal stamping parts. I hope the above content can help readers.

    Read More →
  • How to adjust the stamping die gap?

    By : Categories : Blog,Industry Comment: Comments Off on How to adjust the stamping die gap?

    1. Washer method

    The gasket method is to place the paper, metal plate or forming workpiece with uniform thickness and the same gap value around the edge of the female mold, then slowly close the mold, and place an equal-height cushion so that the male mold can enter the edge of the female mold, and observe the male mold. and the gap between the die. If the gap is not uniform, adjust the gap by tapping the punch fixing plate until it is uniform, then tighten the upper die fixing screw, then put the paper into the test punching hole, and observe the blanking of the paper until the gap is uniform. Finally, after clamping the upper mold base and the fixing plate, drill and ream the dowel pin holes together, and then punch the cylindrical pins. This method is widely used in small and medium punching dies, drawing dies, bending dies, etc. It is also suitable for controlling the wall thickness of plastic molds.

    2. Copper plating method

    For punching dies with complex shapes and a large number of punches, it is difficult to control the gap with the above method, so a layer of soft metal (such as copper plating) can be plated on the punch surface, and the coating thickness is equal to the punching gap value on one side , and then adjust, fix and position as above. There is no need to remove the coating after assembly, and it will fall off naturally during the cutting process.

    3. Coating method

    The coating method is to apply a layer of enamel or amino acid paint on the surface of the punch. When painting, you should choose paints of different viscosity according to the size of the gap, or control the thickness by painting multiple times. After painting, the punch assembly should be baked in a 100120 oven for 0.5-1 hour until the thickness of the paint layer is equal to the blanking gap value, which should be uniform, and then adjusted, fixed and positioned according to the above method.

    Four, light transmission method

    The light transmission method is to illuminate the bottom surface with light after the upper and lower molds are closed, observe the size of the light gap around the edge of the convex and concave mold, and judge whether the blanking gap is uniform. If the gap is not uniform, adjust, fix and position. This method is suitable for thin blanking dies that require high assembly fitters. For example, it is best to use a die gap gauge for inspection and adjustment.

    Read More →
  • What are the layout methods of precision stamping parts?

    By : Categories : Blog,Techniques Comment: Comments Off on What are the layout methods of precision stamping parts?

    1. Sampling of waste

    Refers to other plates other than workpieces during the blanking process of precision stamping parts, including process waste and structural waste. All material contour lines are blanked, and there are process residuals between workpieces and workpieces and between workpieces and strips. Due to the blanking along the closed contour of the blanked part, the quality and die life of the blanked part will be relatively high.

    2. Sampling with less waste

    Precision stampings are cut or stamped along the contours of parts of the workpiece and have laps between the workpiece and the workpiece, and between the workpiece and the sides of the strip. The blanking of this method is only a part of the contour of the workpiece, which is affected by the quality of the cut strip, the positioning accuracy and the error. The quality of the blanking parts is slightly poor, but the material utilization rate can reach 70%~90%.

    3. No waste layout

    Precision stamping parts have no overlap between the blanking parts and the blanking parts, and between the blanking parts and the sides of the strip. In fact, the blanking parts are obtained by cutting the strip, and the material utilization rate can reach 85%-90%. However, this layout method will make the quality of the blanking parts slightly worse.

    Read More →
  • What problems should be paid attention to in sheet metal cabinet processing?

    By : Categories : Blog,Industry Comment: Comments Off on What problems should be paid attention to in sheet metal cabinet processing?

    1. In the process of sheet metal processing, sometimes there are too many redundant materials, and redundant materials often appear in the closed position of multiple bending edges. This is usually due to a process error or a drawing error.

    2. The bending machines of some sheet metal cabinet processing manufacturers have restrictions on bending, which are mainly reflected in the height of one side and two sides. The height of one side is limited by the size of the bending machine and the height of the upper cutter. The solution is to use a large-angle polygonal bending; but the height of both sides is not greater than the height of one side, and it is also limited by the bottom edge: bending The height should be less than the bottom edge.

    3. Pay attention to the edge of the sheet metal after bending. If left untreated, it will affect the strength of the sheet metal. Mainly by welding.

    4. Due to the thin plate material of sheet metal parts, it is not suitable for hot-dip galvanizing. Common surface treatment methods include phosphating and electrostatic powder spraying, which are surface treatment procedures for sheet metal parts.

    The above four points are the matters that sheet metal cabinet manufacturers need to pay attention to in the processing process. If you want to do a good job of sheet metal processing, you need to pay more attention to each process. Pursue better quality and provide customers with high-quality products.

    Read More →
  • What is the reason why the punch of metal stamping parts wears too fast?

    By : Categories : Blog,Industry Comment: Comments Off on What is the reason why the punch of metal stamping parts wears too fast?

    1. What is the reason why the punch of metal stamping parts wears too fast during the processing?

    1. The gap of the metal mold is too small. Generally, the total gap of the Jianhan mold is 20%-25% of the thickness of the material plate.

    2. The concave mold is not conducive to neutrality, including defects such as mold base, mold assembly and rotary tower insert sleeve.

    3. The temperature of the first simulated test is too high, which is mainly caused by the long-term continuous stamping of the same mold.

    4. Improper grinding method of die edge will lead to annealing and increase wear.

    5. For local single-sided punching, such as step punching, punching angle or shearing force, the lateral force of the aluminum alloy door and window components will cause the punch to deviate to one side, reducing the edge gap, resulting in serious punching. Die wear. If the installation accuracy of the machine tool die is not high, the punch will deflect to the upper die, thereby damaging the punch and the die.

    6. The raw materials you buy may be defective.

    7. Usually there is no machine maintenance and so on.

    Well, the above is the relevant content of “Is the punch of metal stamping parts worn too fast?” I hope the above content can help you!

    Read More →